Before discovering the Test Mode, make sure Nosto identifies users correctly. In practice, when users log in to your store, Nosto needs to track their customer information. To learn more, read our dedicated guide here.
–
Introduction
When you have adjusted the settings of your Nosto Email Widget campaign, you can preview the product recommendations in the Nosto interface or in your Email Service Provider platform through a template editor or via test emails.
In Email Marketing, as it’s common practice to preview email campaigns to validate content and design before sending emails to real customers, it’s equally important to validate Nosto Email Widgets behavior following the same methodology.
If you have selected one of the following recommendation types: Browsing History, Personalized Recommendations, Browsing History Related or Order Related Recommendations, Nosto will use the recipient email address as an identifier to serve product recommendations. To make sure Nosto will serve the correct product recommendations to the correct recipients, below is a step-by-step guide that will help you to validate that the Email Widget campaign will behave as expected.
If you create a new campaign, save and activate, Test Mode is by default enabled for one hour.

If you go to advanced settings or save the campaign as a draft, the Test Mode is disabled and you need to go to the Advanced Settings page, enable it and Save the campaign.
Testing Browsing History
How to validate browsing behavior tracking?
As it all starts with interactions between visitors of your store and the products they view, Nosto needs to track browsing behavior and products viewed events correctly. To double check this in the context of Email Widgets, we recommend you to follow these steps:
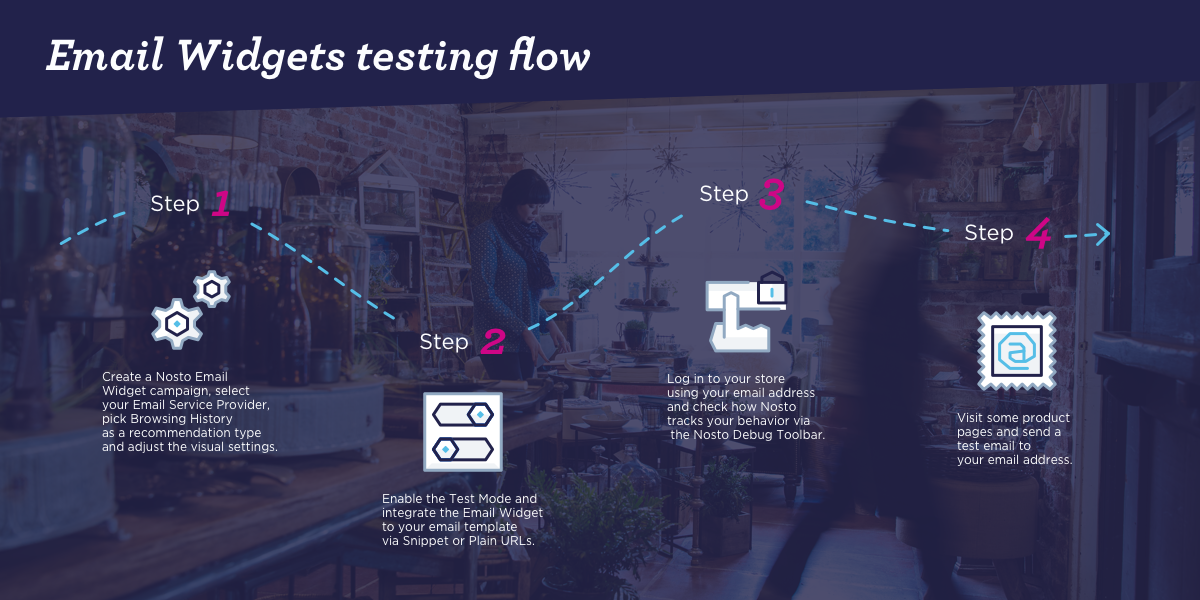
Step 1. Create a Nosto Email Widget campaign, define your Email Service Provider and select Browsing History as a recommendation type. Adjust the visual settings following your brand guidelines.
Step 2. Enable Test Mode and save. The Test Mode is active for one hour. The Test Mode invalidates server cache for one hour, enabling you to easily integrate the Email Widget into your email template. When the Test Mode is inactive, product recommendations are cached for around 30 mins to 1 hour as soon as it has been served to a given recipient. This allows faster response time and optimizes the overall performance of the campaign. Once the test mode has been enabled and the campaign saved, you can now integrate the widget (via snippet or plain URLs) to your email template in your Email Service Provider template editor.
Step 3. Log in to your store and validate that Nosto tracks your email address correctly through the Nosto Debug Toolbar.
Step 4. You can now visit some products (at least 4 or 5 available products). When this is done, you can send a test email to the email address you are logged in with and observe the products recommended. Selection should match the products you just viewed.
Let’s summarize: