
Abandon Cart Email is triggered by cart abandonment. Nosto also needs to identify the visitor. The number of emails sent can be increased by enabling site abandonment pop-up and by applying customer tagging on site to use-cases when customer opts in for email marketing.
Best practice is to send the email 5-30 minutes after abandonment and potentially again 24 hours later. Typically emails sent more than 24 hours after don’t perform well, but this is dependent on business.

Setting up an Abandoned Cart Email campaign is easy and take only a few clicks.
This manual presents the steps to follow in order to launch an abandoned cart email campaign.
Abandoned Cart
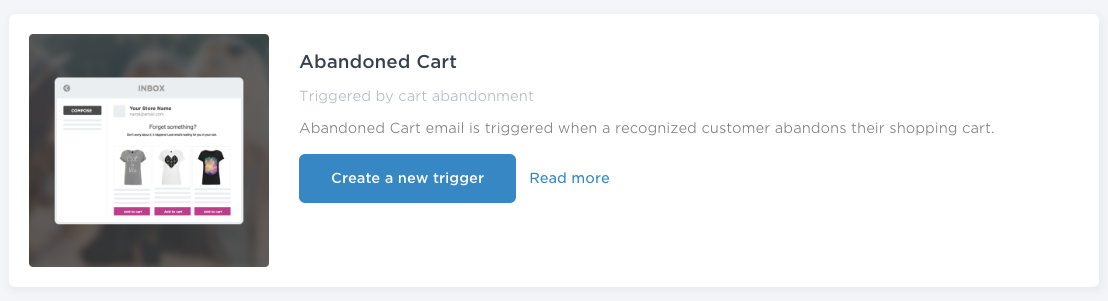
Under the Abandoned Cart section, click the “Create a new trigger” button in the interface:
Campaign Type
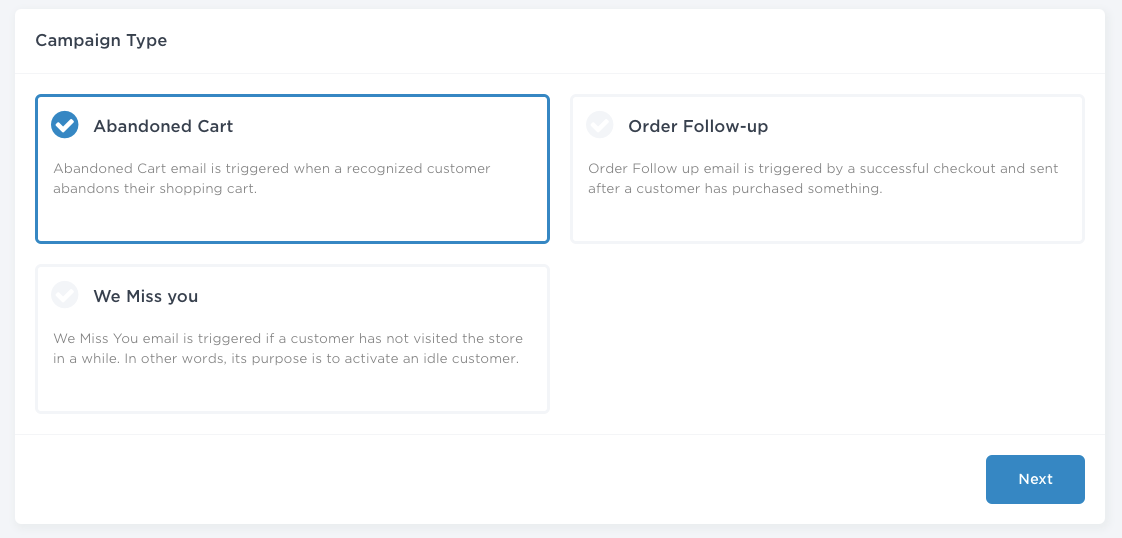
The Campaign Type has been pre-set. You can click “Next”.
Campaign Settings
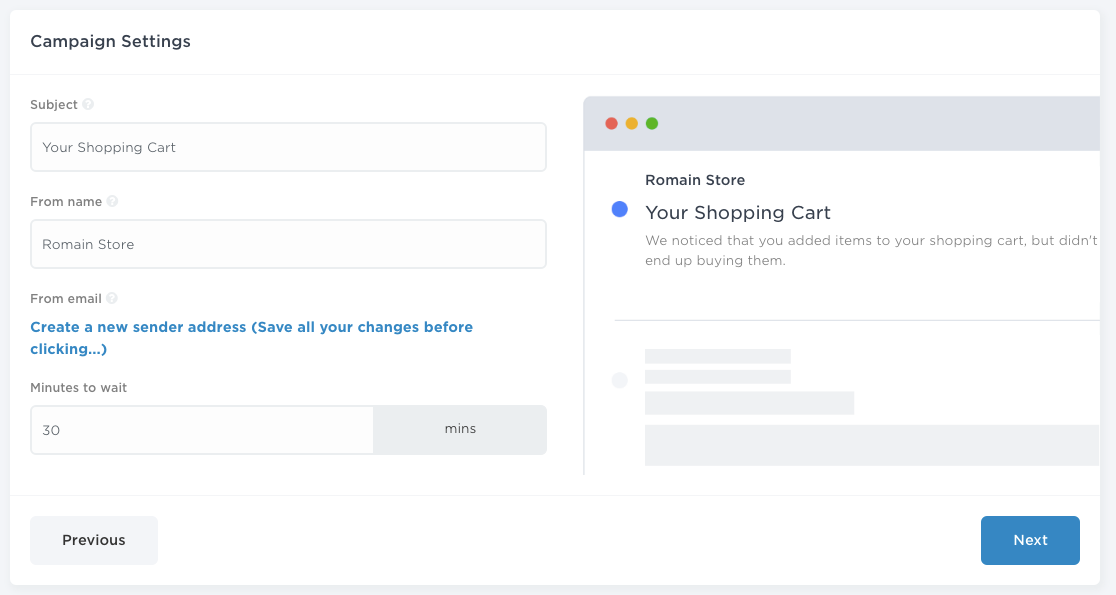
SubjectSubject defines the subject of your campaign.
From nameFrom name set the name of the sender for the campaign.
From emailFrom email defines the address of a sender visible for a receiver.
Minutes to waitMinutes to wait adjusts when the email campaign is sent after the cart abandonment occurs on-site. Best practices is to send the campaign 30 minutes after the abandonment.
Visual Settings
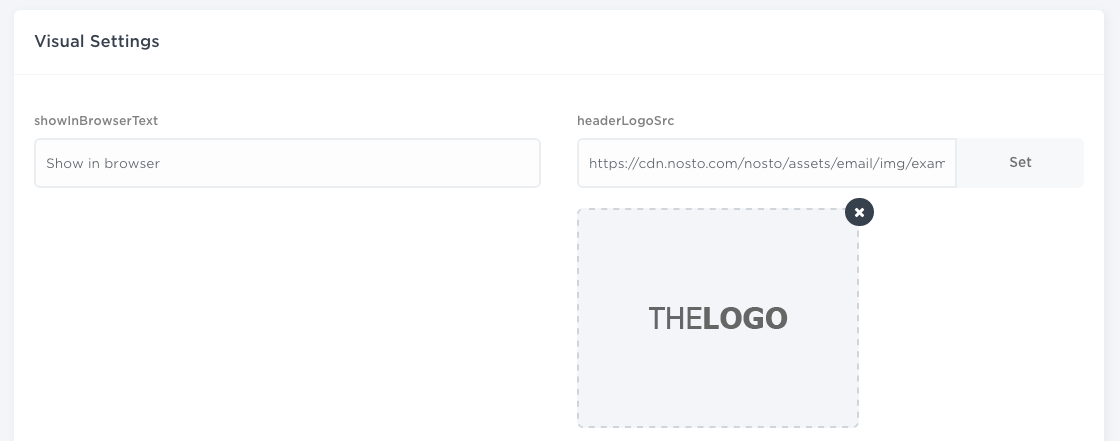
You can modify the content of the email campaign using the input fields.
Preview
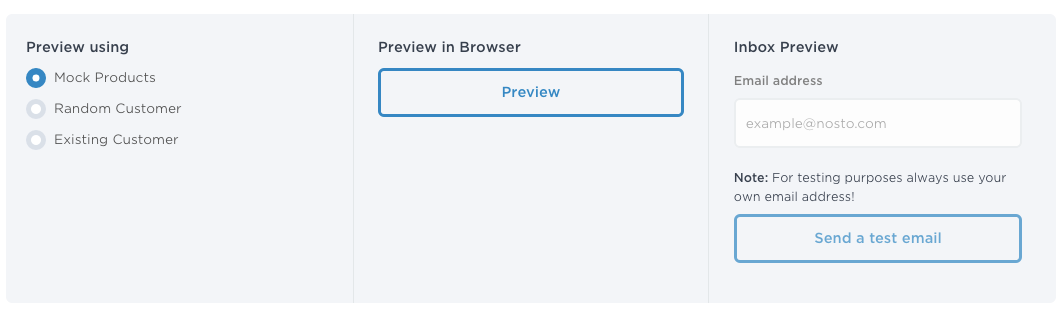
When satisfied with the content, you can preview using three functions:
Mock productsMock products populates the email with mock-up products.
Random CustomerRandom Customer picks up randomly one user of your database and demonstrate what the content of an abandoned cart email would be for the given user.
Existing CustomerExisting Customer gives the possibility to input a specific email address and preview how the abandoned cart email would render for that email address.
You can choose whether you want to preview the campaign in browser or directly into your inbox. If you choose the latter, input your email address and click “Send a test email”.
Overview
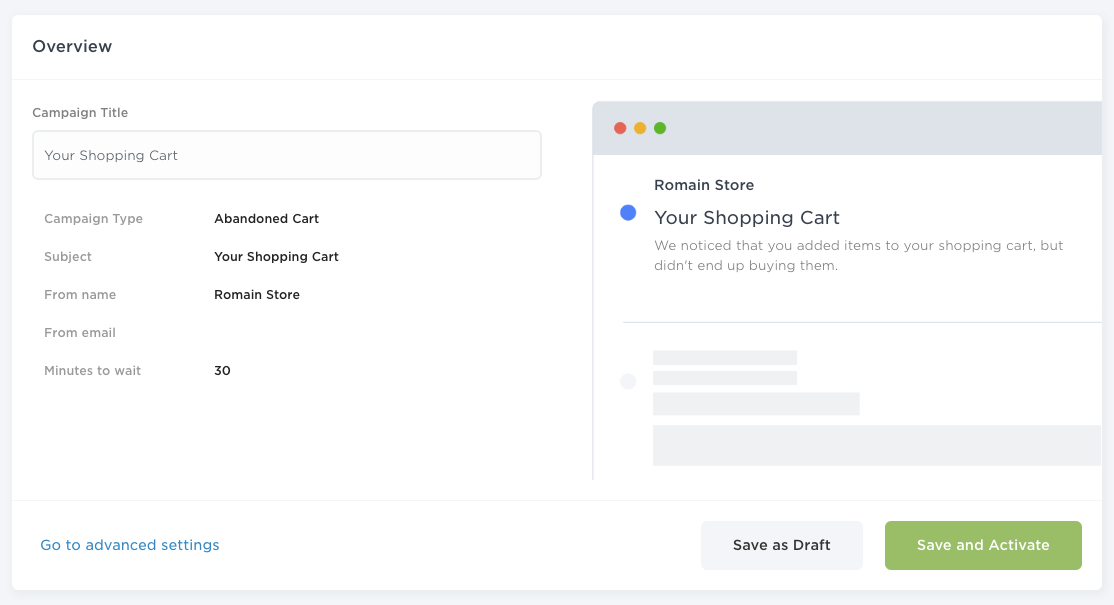
The Overview section is the final step.
Before launching your campaign, a title can be set. We recommend to give an informative title to the campaigns so that it becomes easy to follow the Key Performance Indicators once several campaigns are live.
You can save as draft and launch the campaign at a later stage or decide to “Save and activate”.
Alternatively, you have access to an Advanced Settings menu by selecting “Go to advanced settings”.