
Nosto accounts come with a set of three triggered email campaigns: an Abandoned Cart, an Order Follow-up and a We Miss You campaign.
It’s easy to get started as all three campaigns have been built around an email template easily customizable! Add your logo, adjust the copy, set the color scheme and going live shouldn’t take more than a few clicks!
Let’s explore in this article the structure of the template and how to edit the different sections!
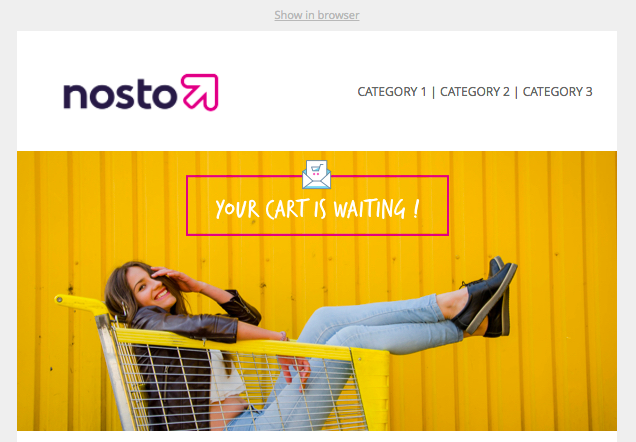
The template is divided into four distinct sections: Header, body, recommendation slots and footer.
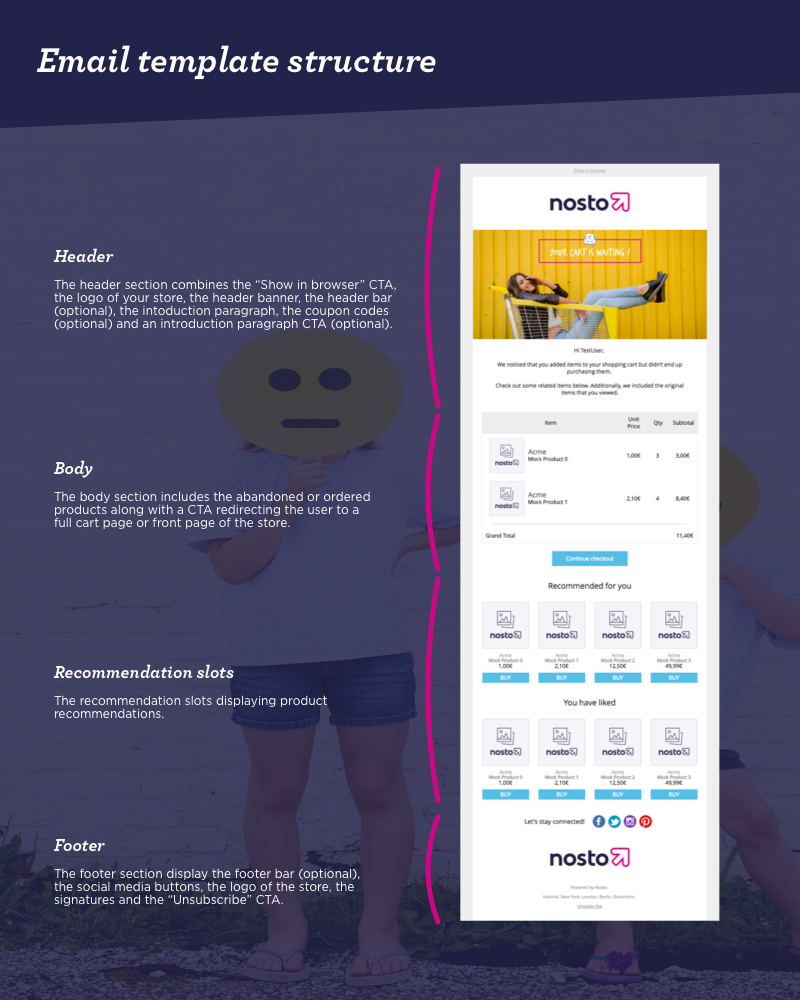
Header
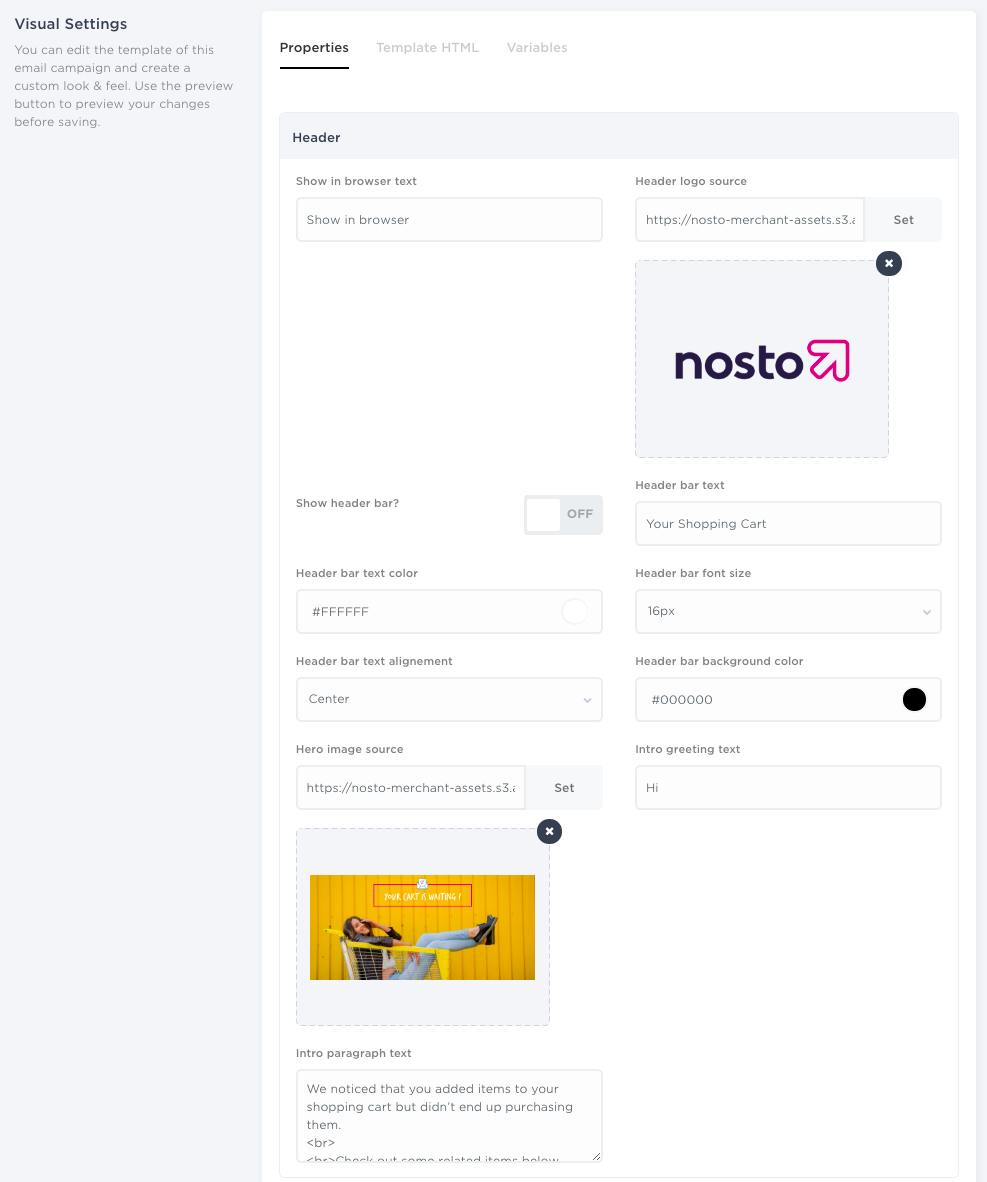
You can adjust in the Header section the main elements of the heading section. As an option, you can switch on a header bar. The header bar is an horizontal bar displayed right below the header banner.
You can also edit the introductory paragraph of your email.
Tip: In case you offer a discount code to recipients of your emails, it’s a great idea to introduce the coupon code using the Intro paragraph text input field.
Header – Multi-use Coupon Code
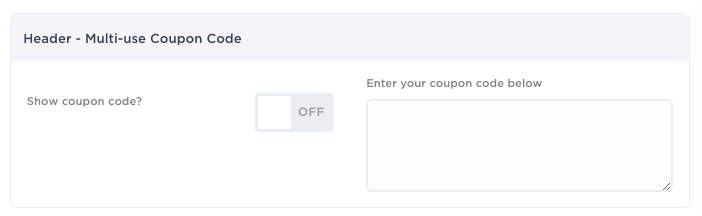
The Multi-use Coupon Code section gives you the possibility to offer a single coupon code to all recipients of the email. Flip the switch, define your coupon code in the input field and it will be displayed below the introduction paragraph.
Header – Navigation menu
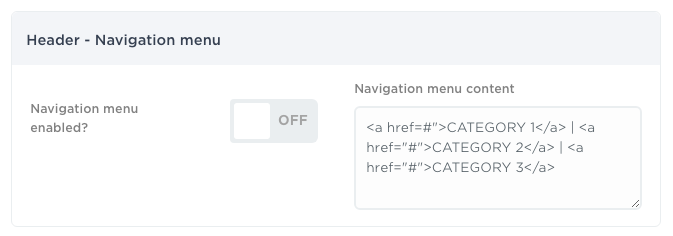
The navigation menu, once enabled, displays a navigation menu on the top right corner of the email. The logo is automatically readjusted and is displayed on the top left corner of the email. It’s a useful option if you want to replicate the navigation categories displayed on your online store for example!
Header – Font
You can define the font of the header section in this section. Three web fonts are available: Open Sans, Roboto and Oswald along with multiple font weights and font styles. If you want to use custom fonts, we recommend you to edit the email template via the Template HTML tab.
Header – CTA Button
If you wish to display a call-to-action below the introduction paragraph, enable the main CTA button. Styling can be adjusted in the CTA Buttons panel below the recommendation slots panels.
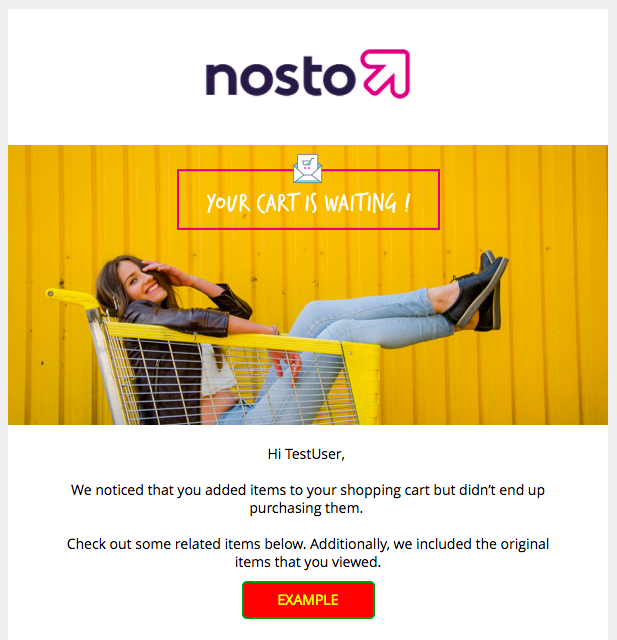
Example:

The settings above would output the following:
Header and Body – Settings
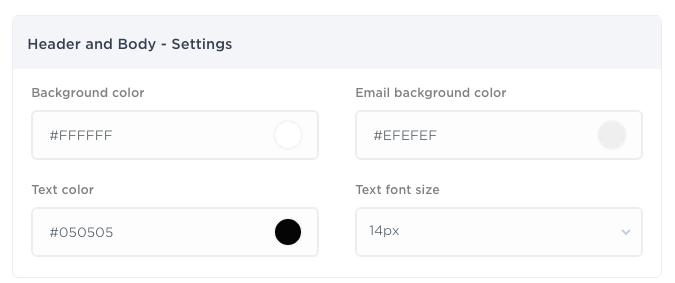
You can adjust the general settings of the header and body in this panel.
Body – Cart Content or Order Content
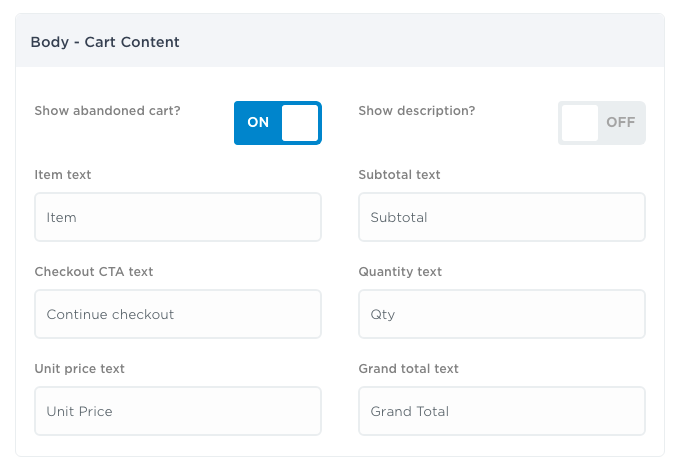
If switched on, users will be served with the products they have abandoned (in case of Abandoned Cart Email) or the products they have ordered (in case of Order Follow-up email).
Body – Font
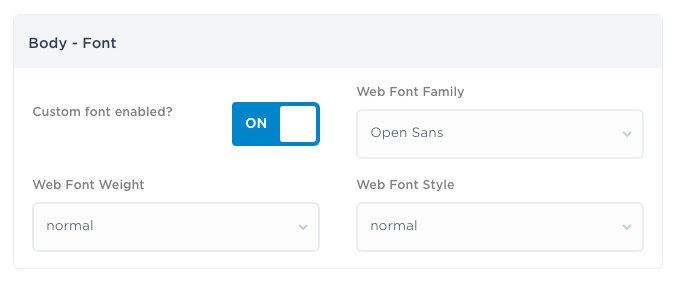
In the Body – Font panel, you can set the font settings of the body, similarly to the Header – Font panel.
Recommendation Slots
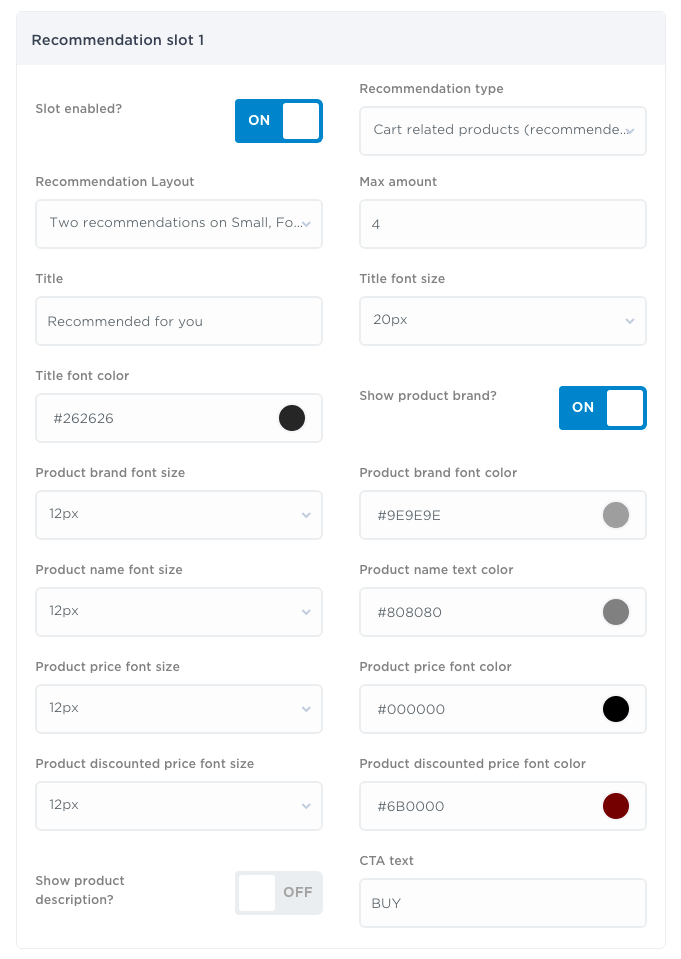
In the recommendation slots panels, you can define the behavior of the recommendation slots and adjust the information of products displayed along with the styling.
CTA Buttons
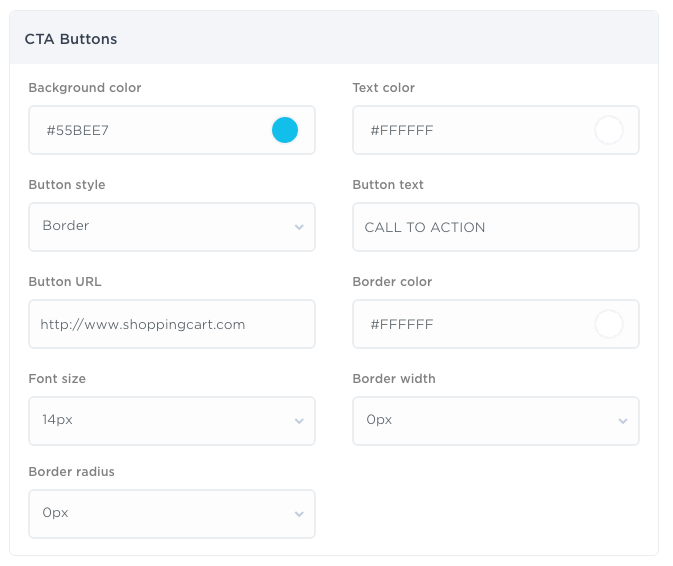
You can style the CTA buttons here and define the wording. This affects all CTA enabled in your email template.
Footer bar
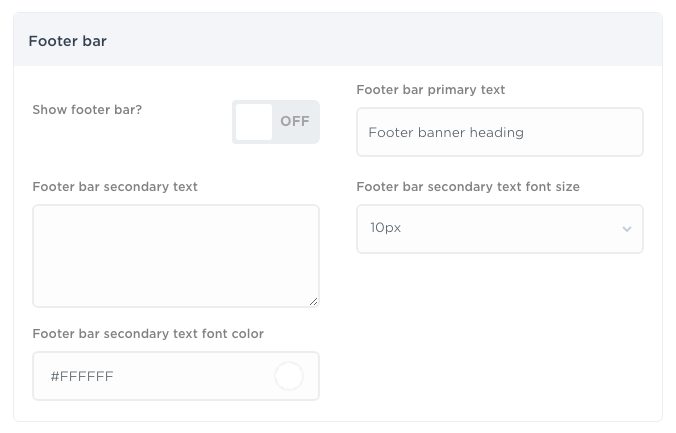
When switched on, the footer bar is similar to the header bar and will be displayed at the bottom of the email, below the recommendation slots and above the footer area.
Footer – Social Media
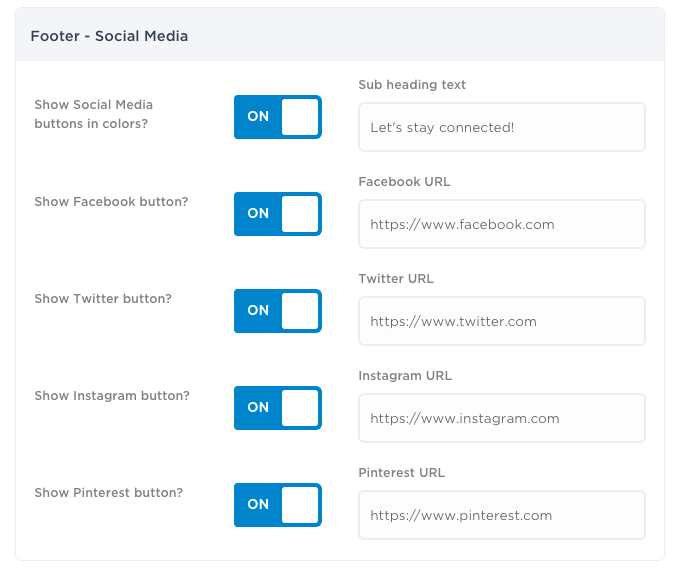
You can enable one or several social media badges in the footer section via this panel. Define the correct URLs and users will be redirected accordingly.
Footer
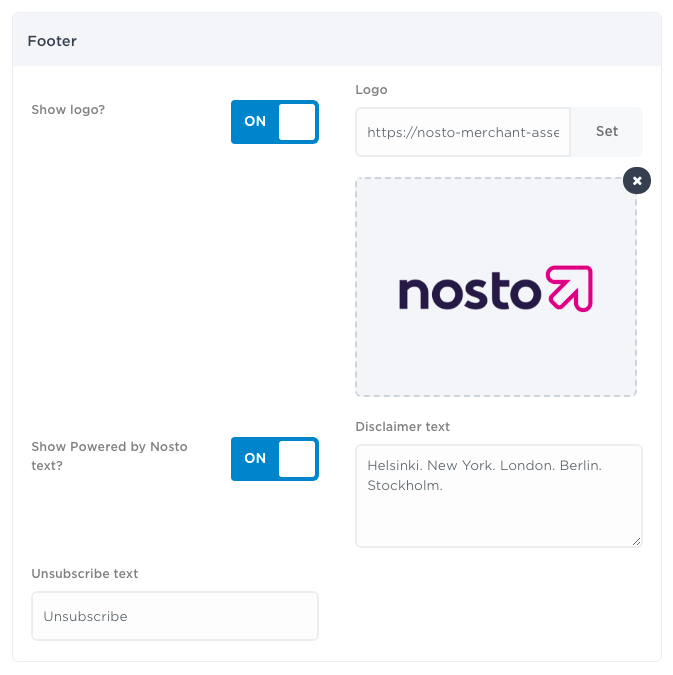
You can decide whetehr you want to display your logo or not in the footer area along with a signature via the disclaimer text input field. The wording of the unsubscribe link can be set in this panel as well.
UTM Tags
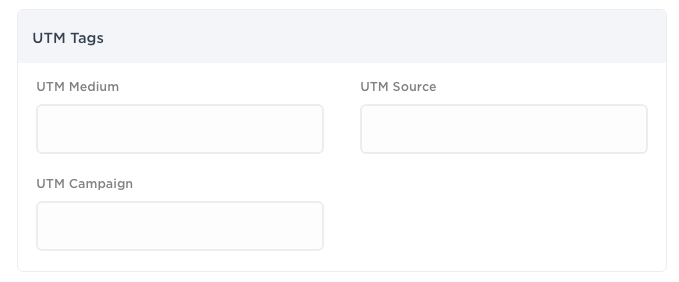
Last but not least, you can set your UTM Medium, UTM Source and UTM Campaign tracking parameters in the UTM Tags panel. All links of the email will include those parameters when users are redirected.