

Nosto email widgets allow you to make use of the intelligence of Nosto to promote right products to the right audience in your newsletters or any other emails you might send to your customers, such as registration emails.
Widgets support all modern email service providers without laborious back-end integration, meaning that you can go live merely in minutes! This tutorial walks you through the steps how to create your first email widget and includes links to other associated articles such as FAQs.

Getting Started: Create a New widget
Navigate to Emails > Email Widgets and Click create a new widget, which will open up the creation wizard.

Choose The Widget Ruleset
In the next menu, choose the widget ruleset, or in other words: What kind of products would you like to promote in the widget. You can also change the ruleset later on. Click next to proceed.
Unsure what type to choose or how recommendation types work in the widget? Read full glossary under manuals section here.

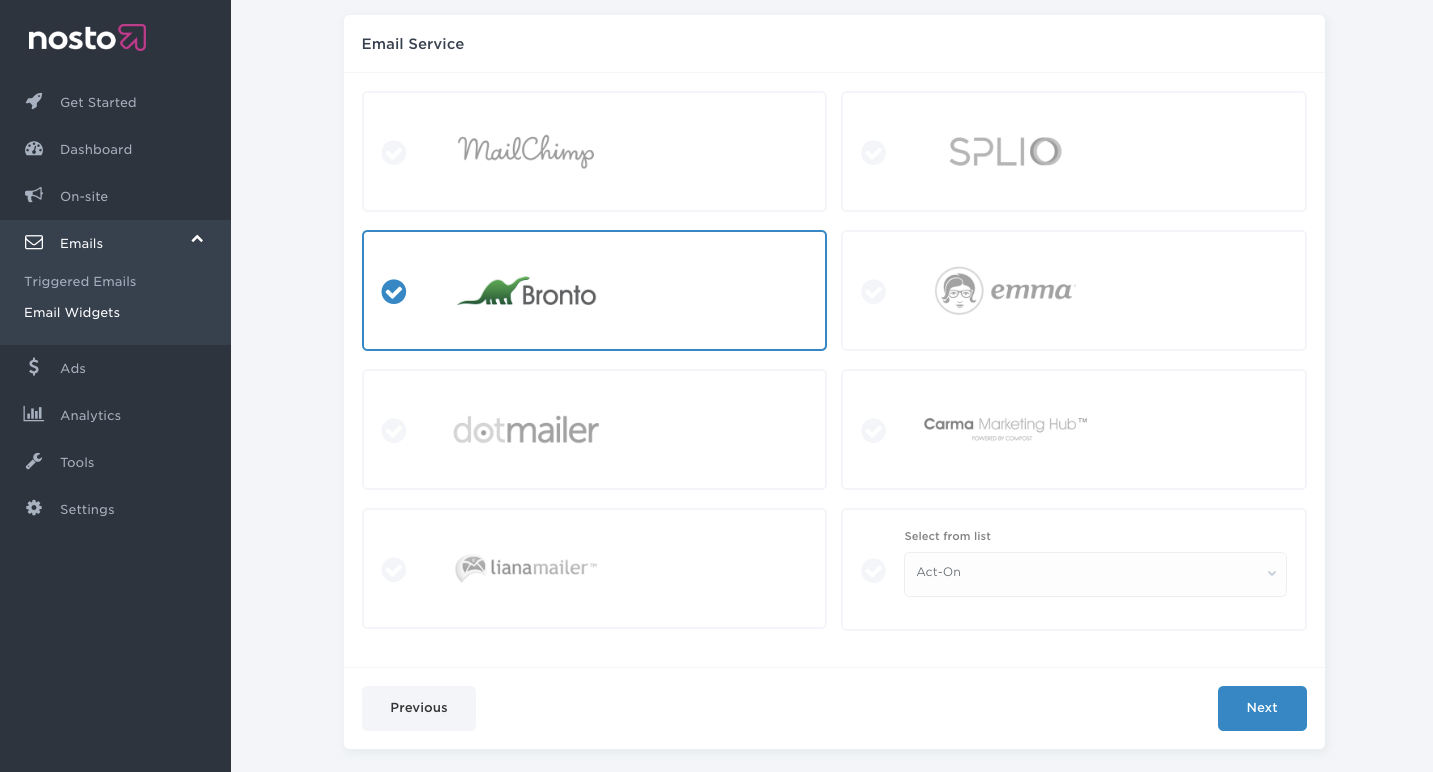
Choose Bronto as an Email Platform
Choose Bronto as your email platform/service provider (ESP) from the list.
Copy and Visual Settings
Under copy and visual step you can amend some key visual aspects of the widget. The widget will feature a product’s image, name and current selling price and also the title as given in Block title input area. By default, Nosto displays four products in the widget.
Preview-button will open up the recommendation in a safe preview-mode on the Nosto admin and allow you to review applied changes before clicking next to proceed.

Save the widget
The final step is to save the widget via the green button “SAVE”.

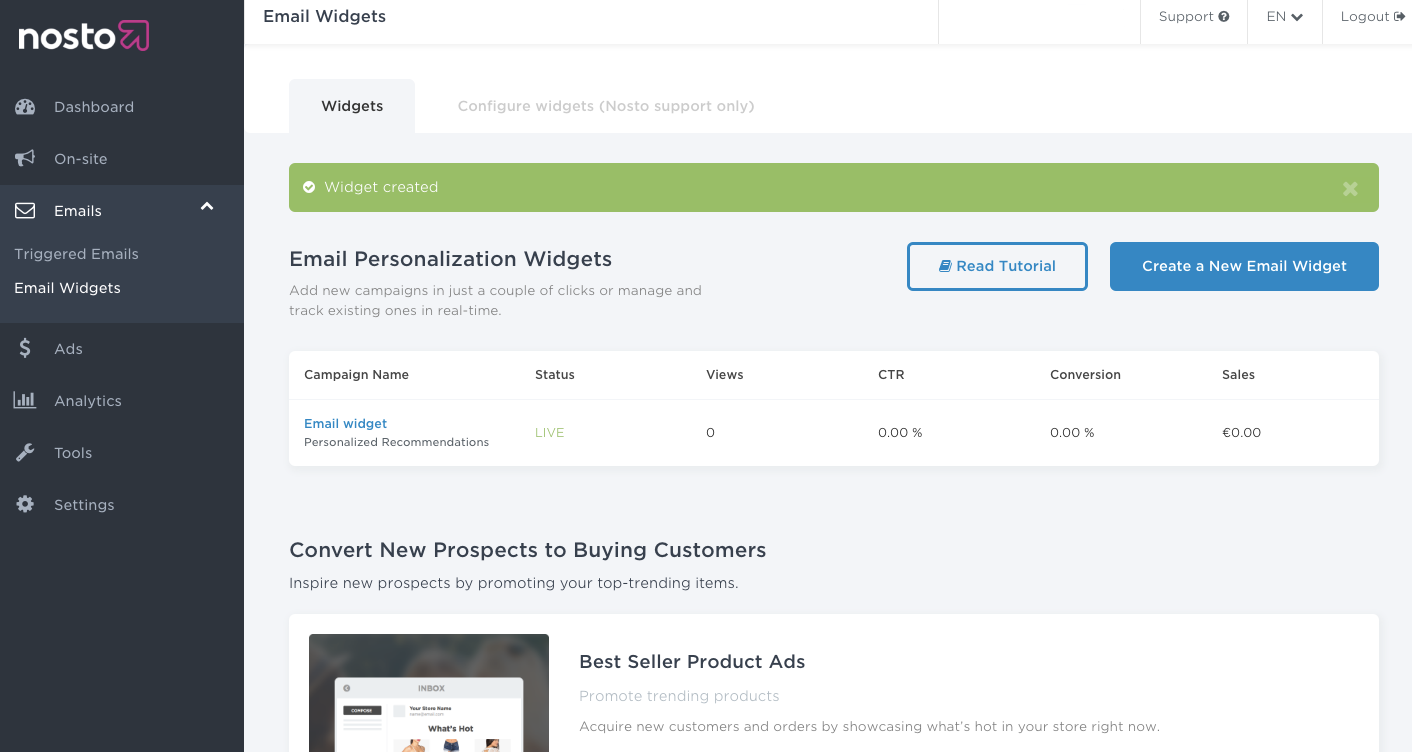
Once the widget has been saved, it’ll be displayed in your interface under the name of the campaign you have defined.
Bronto specific implementation
Select the email widget and scroll down at the bottom of the page. Click “Plain” to access the plain mode editor, “Copy to Clipboard” and click “Save”
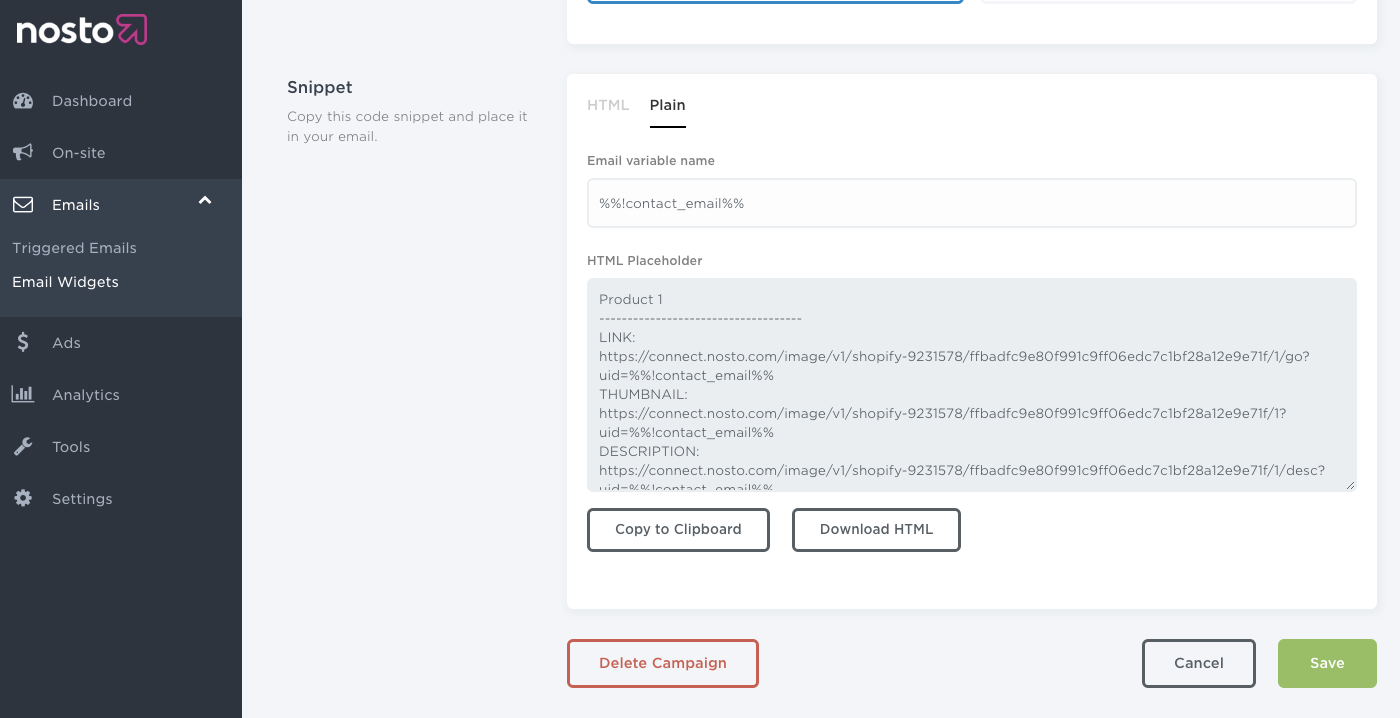
Open your favorite text editor and paste the snippet generated in the Nosto interface.
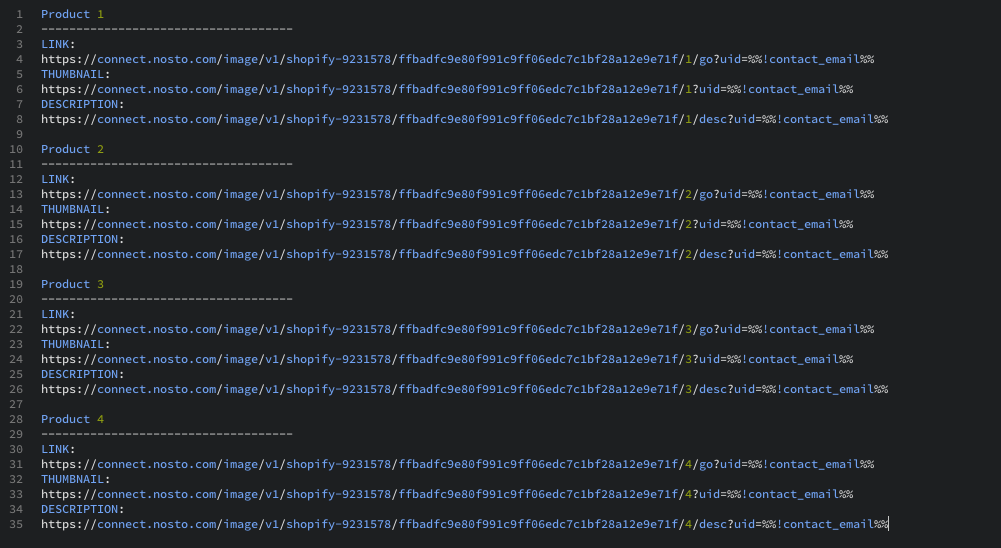
The URLs displayed reflect the positioning of the products within a Nosto Email Widget. By default, 4 products can be recommended in one widget.
One product recommended is represented by a product thumbnail and a redirection link and a product description image and a redirection link.
Note: The redirection link is the same. It redirects the user to the product page of the recommended product.
You are now ready to implement the Nosto Email Widget in the Bronto interface.
Bronto Interface
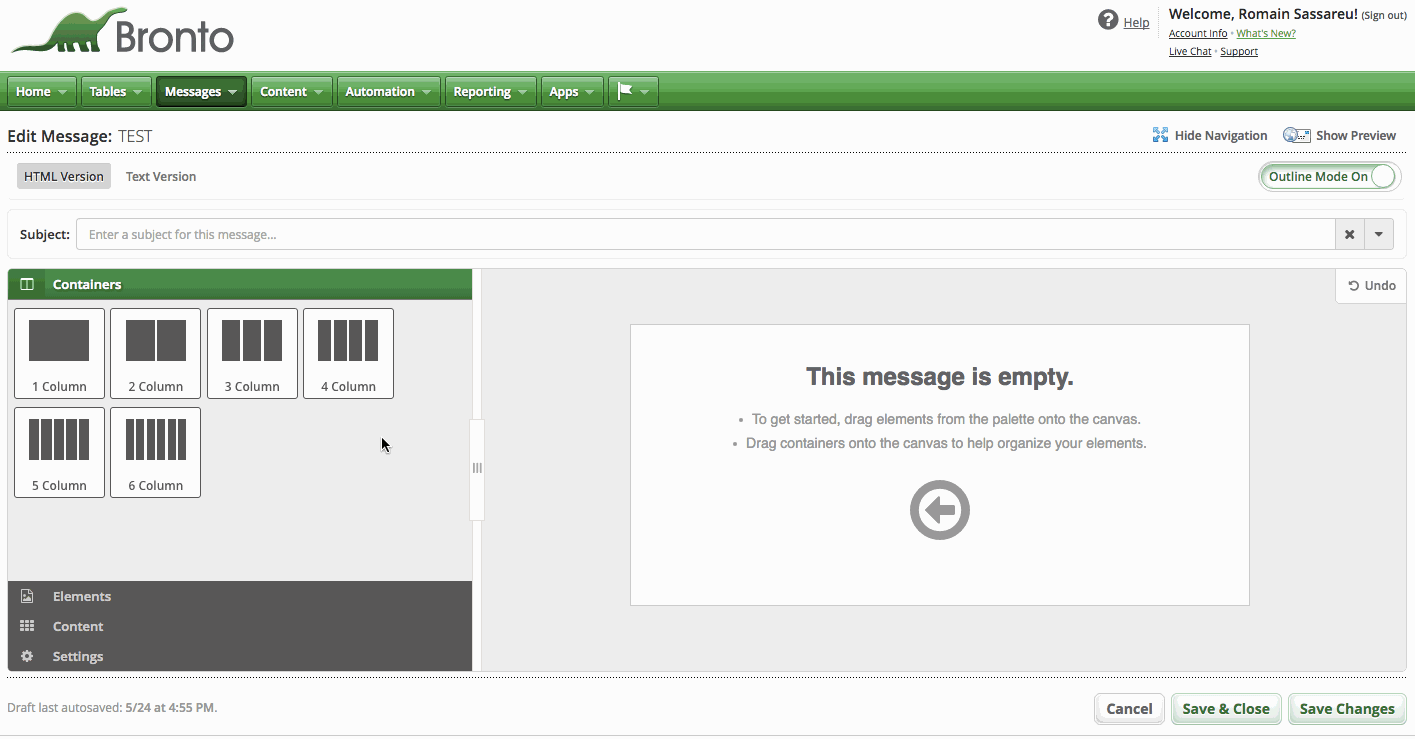
Log in to your Bronto interface and select Messages > Messages.
Select your message listed in your “Messages” tab and click “Edit”.
Note: Alternatively, you can create a new message by hitting “Create New Message at the trop right corner.
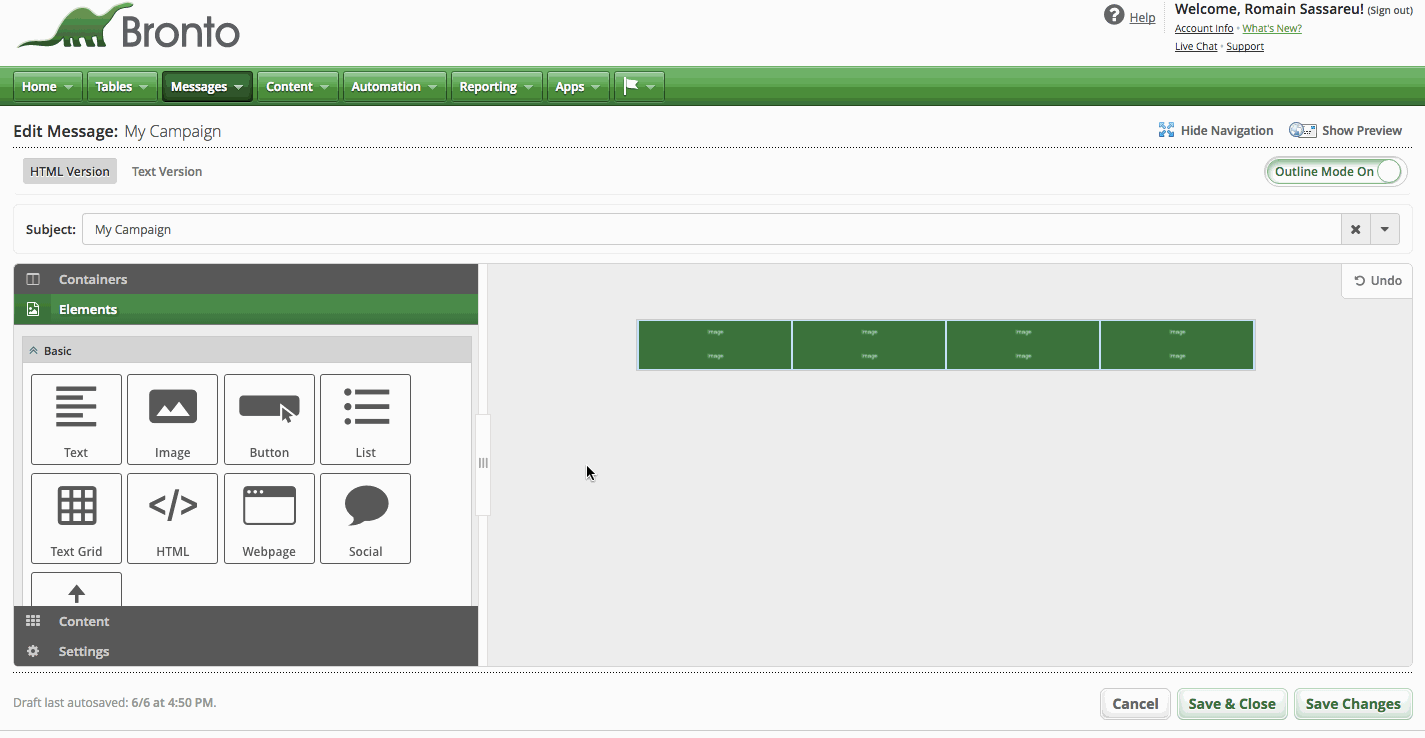
Select Containers and drag and drop “4 Columns” from the palette onto the canvas
Select “Elements” and drag 8 Images elements in the container.

You now need to edit the Images elements and import the URLs from the Nosto Email Widget snippet.
Product Image blockThe Nosto “THUMBNAIL” link must be imported into the Bronto “Image URL” fieldThe Nosto “LINK” into the Bronto “Link” field.
Product description block:The Nosto “DESCRIPTION” link must be imported into the Bronto “Image URL” field.The Nosto “LINK” into the Bronto “Link” field.
Note: It’s important to respect the positioning of the products. For instance, “Product 1” links must be placed on position #1 within the widget.
When you have imported all the links into Bronto, you can click “Save Changes” and the products will be recommended dynamically when each recipient opens his email campaign.